Github Actions for connecting two Github repositories
In this guide, we'll leverage GitHub Actions to automate the publication of the documentation for my `Python` package. The documentation needs to be first pushed to a distinct GitHub repository, which is repsponsible for serving the GitHub Pages.
MkDocs documenation
Working on the development of a Python package dedicated to regional effect plots (named effector with a close official release—stay tuned!), I reached the documentation phase. Looking around, I discovered the MkDocs package, specifically its mkdocs-material theme. I was impressed by its elegance and user-friendly nature, considering it a noteworthy and straightforward alternative to the widely adopted Sphinx package. You can take a look at the documentation site I effortlessly created here.
Upon completing the site creation, I explored hosting options and identified two primary alternatives: readthedocs and GitHub Pages. Given my familiarity with GitHub Pages, I opted for the latter.
Mkdocs provides a convenient command, mkdocs gh-deploy, for deploying documentation to the same GitHub account as your package. However, this command cannot help in our case. I have developed effector in my personal GitHub account givasile/effector, and my personal account hosts my personal webpage. Since GitHub allows only one GitHub Page per account, I had to creae a separate GitHub account xai-effector/xai-effector.github.io to host the documentation for effector.
The missing link is an automation to connect the givasile/effector repository in my personal account with the xai-effector/xai-effector.github.io, which serves as the source repo for publishing the documentation at https://xai-effector.github.io. The solution I am about to outline can be extended to connect any two repositories from different accounts, such as account_1/repo_1 to account_2/repo_2.
Github Actions
GitHub Actions is a way to initiate an action (workflow) in response to a new commit in a GitHub repository. In our specific case, we aim to initiate the workflow whenever a new commit is pushed to givasile/effector. This workflow comprises two main tasks: (a) building the documentation located within givasile/effector/docs and (b) pushing the compiled documentation to xai-effector/xai-effector.github.io.
Let’s initialize the workflow:
on:
  push:
    branches:
      - main
    tags:
      - v*

jobs:
  build-documentation:
  ...

  push-site:
  ...
In the provided snippet, we specify that the GitHub Action should only be triggered in the event of a new release—specifically, a new commit in the main branch with a tag starting with v*, such as v0.0.1.
Build the documentation
In the first job, we build the documenation using mdkdocs build and we store it as an artifact:
  build-documentation:
    runs-on: ubuntu-latest

    steps:
    - name: Checkout current repo
      uses: actions/checkout@v2

    - name: Set up Python
      uses: actions/setup-python@v4
      with:
        python-version: 3.11

    - name: Install dependencies
      run: |
        python -m pip install --upgrade pip
        pip install mkdocs mkdocstrings mkdocstrings-python mkdocs-material

    - name: Build docs
      run: |
        cd docs
        mkdocs build
        cd ..

    - name: Save site site as artifact
      uses: actions/upload-artifact@v2
      with:
        name: docs-site
        path: docs/site
Push to another repo
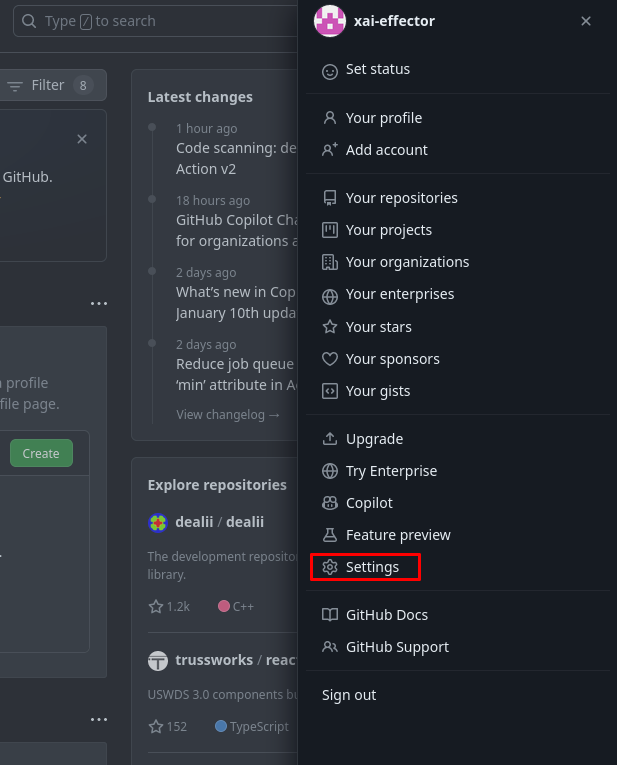
To push the compiled site to xai-effector/xai-effector.github.io, we require credentials. This can be achieved in two steps. Initially, we have to navigate to xai-effector GitHub account and generate a TOKEN that enables to programmatically access all repositories of xai-effector. To do so, click on the account image, and then access settings (located at the top-right).
After selecting Developer Settings from the list on the left (bottom-left), generate a new token as shown in the image below. Copy the token to the clipboard (or store it securely), as it will be required in the subsequent step. This token serves the purpose of programmatically connecting to the xai-effector GitHub account.

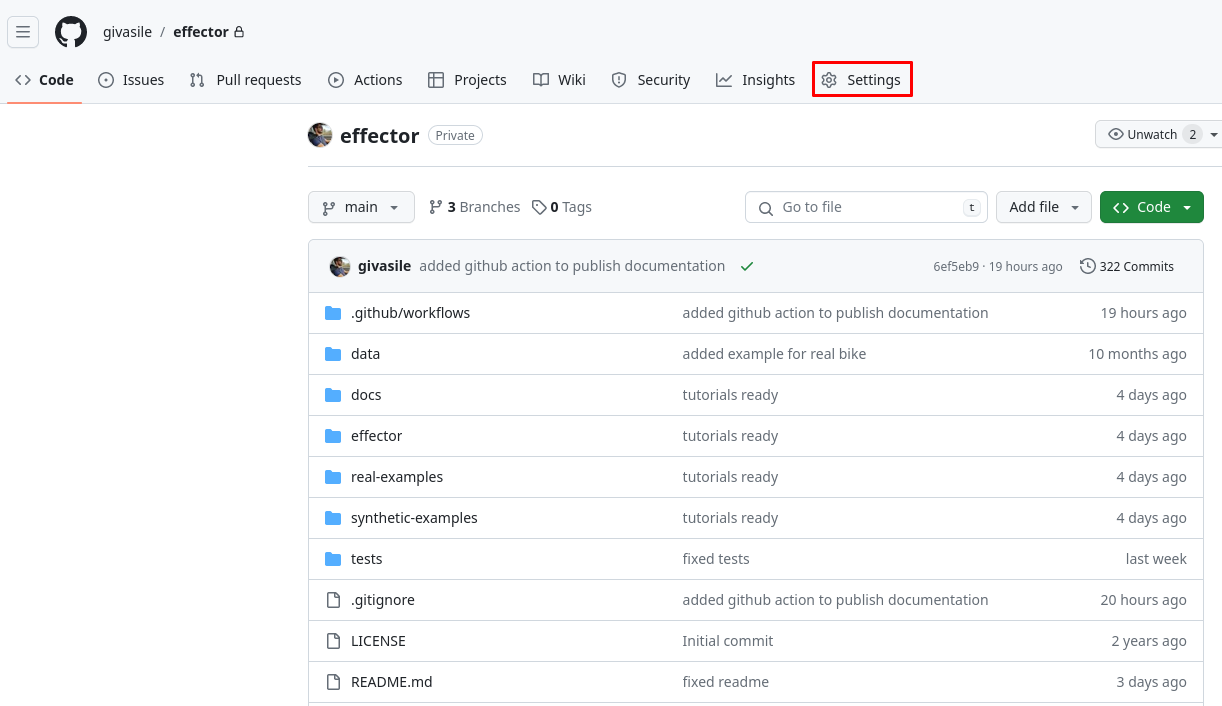
Following this, log out of the xai-effector account and log in to the givasile account. Navigate to the givasile-effector repository and access the settings of the repo.
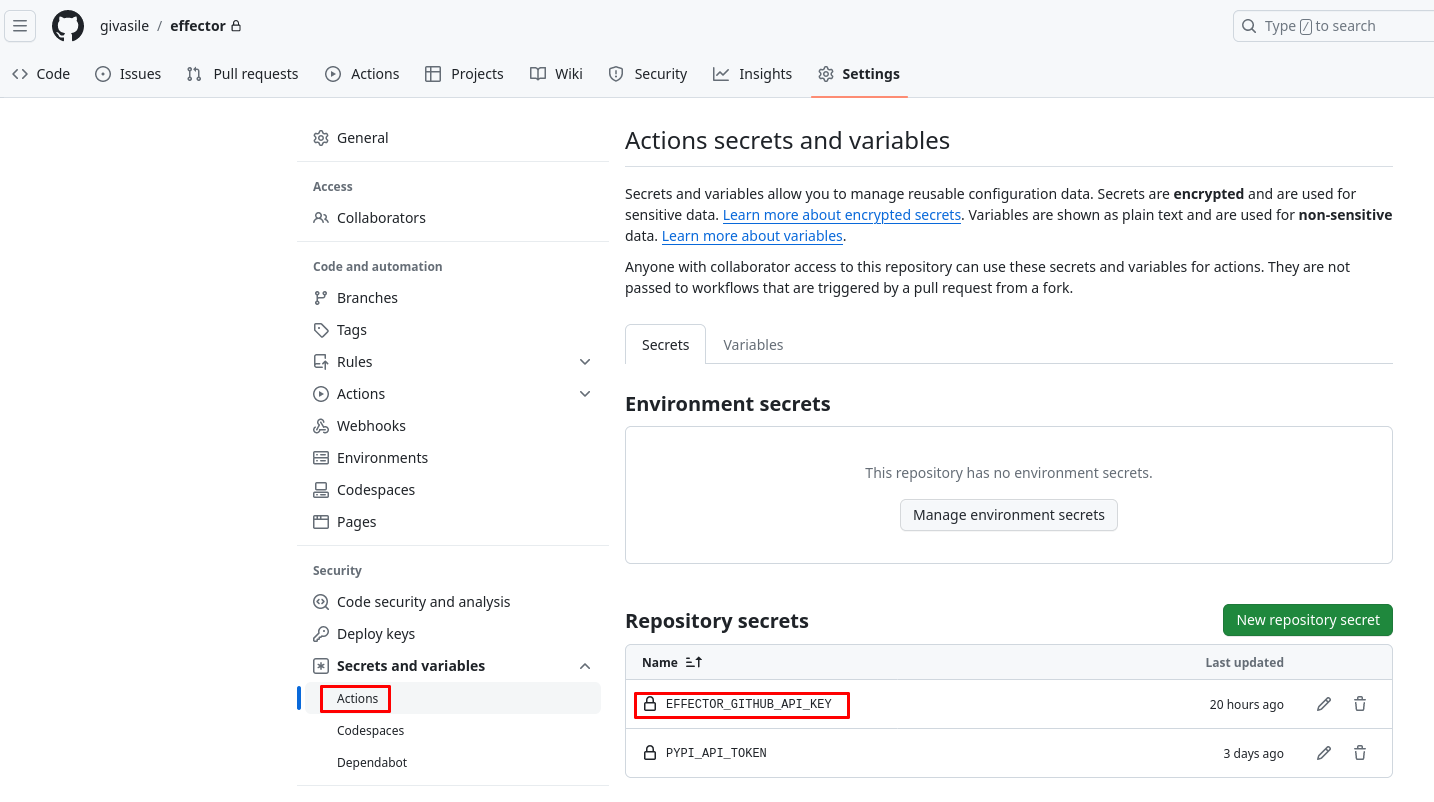
Now, within the givasile-effector repository, go to Actions -> Secrets and add a new token. Give the token any name you prefer (e.g., I named it EFFECTOR_ACTION_API_KEY), and paste the token that you copied earlier. This step ensures that the token for accessing xai-effecor is accessible from any GitHub action associated with givasile/effector.
Now we have all we need to push the documentation with the following job:
  push-site:
    name: Copy site to effector.github.io
    needs:
    - build-documentation

    runs-on: ubuntu-latest

    steps:
    - name: Download the site as artifact
      uses: actions/download-artifact@v2
      with:
        name: docs-site
        path: site

    - name: Clone xai-effector.github.io and checkout gh-pages branch
      uses: actions/checkout@v2
      with:
          repository: xai-effector/xai-effector.github.io
          ref: gh-pages
          token: $
          path: xai-effector.github.io

    - name: rm old site and copy new site
      run: |
          rm -rf xai-effector.github.io/*
          cp -r site/* xai-effector.github.io

    - name: commit and push
      run: |
          cd xai-effector.github.io
          git config --global user.email "ntipakos@gmail.com"
          git config --global user.name "ntipakos"
          git add .
          git commit -m "Update site from ntipakos/effector"
          git push --force origin gh-pages
In the snippet above, we first download the artifact (the built site) from the first job. Then, we clone the xai-effector/xai-effector.github.io repository and specifically the gh-pages branch. Note that for connecting to the xai-effector GitHub account, we utilize the token $ we created before. Subsequently, we clear all existing files from the repository and copy over all files from the build site, effectively replacing the old with the new site. Finally, we commit the updated files and push them to the repository.
Summary
There you have it! With this process, whenever a new tagged commit is made to the givasile/effector repository, the revised documentation will be automatically committed to the gh-pages branch within the xai-effector/xai-effector.github.io repository. Subsequently, it will undergo automatic redeployment to xai-effector.github.io.
The approach above is applicable in a broader context. You can substitute givasile/effector and xai-effector/xai-effector.github.io with any account_1/repo_1 and account_2/repo_2, and you have a generic workflow for automatically committing the latest changes from repo_1 to repo_2.